First Responders in Education
Is your school prepared for a phased-in return to campus? Will your students be given a choice in how they participate and engage in their courses during this transition; onsite or offsite? If yes, how will you integrate face-to-face and remote learning experiences within the four walls of a physical classroom? Read below to learn how Jose Tagle, Director of Technology at The Buckley School, has successfully addressed these important questions.
Buckley has successfully integrated remote participation into face-to-face classes for several weeks now. Although I will focus on the technological side of a classroom setup, there is a lot of planning and learning involved for teachers. It is important to design and plan for the inclusion of in-person and remote learners. Teachers need to allocate time for setting-up, engaging in informal check-ins with in-person and remote students, pausing to check the chat and answer student questions, providing guidance and clear instructions to in-person and remote learners, and debriefing on those activities. Given all of this, teachers have adjusted their expectations of how much can be accomplished during a class session and prepare their students for what they will do and what they should do in case of technical difficulties.
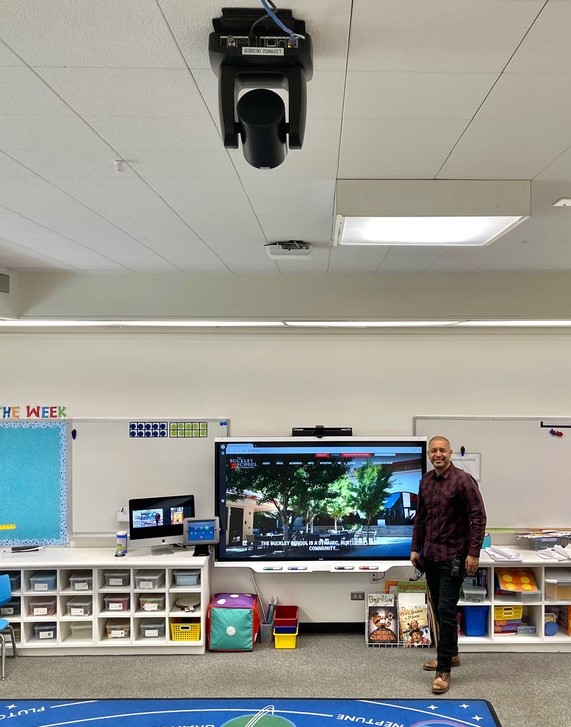
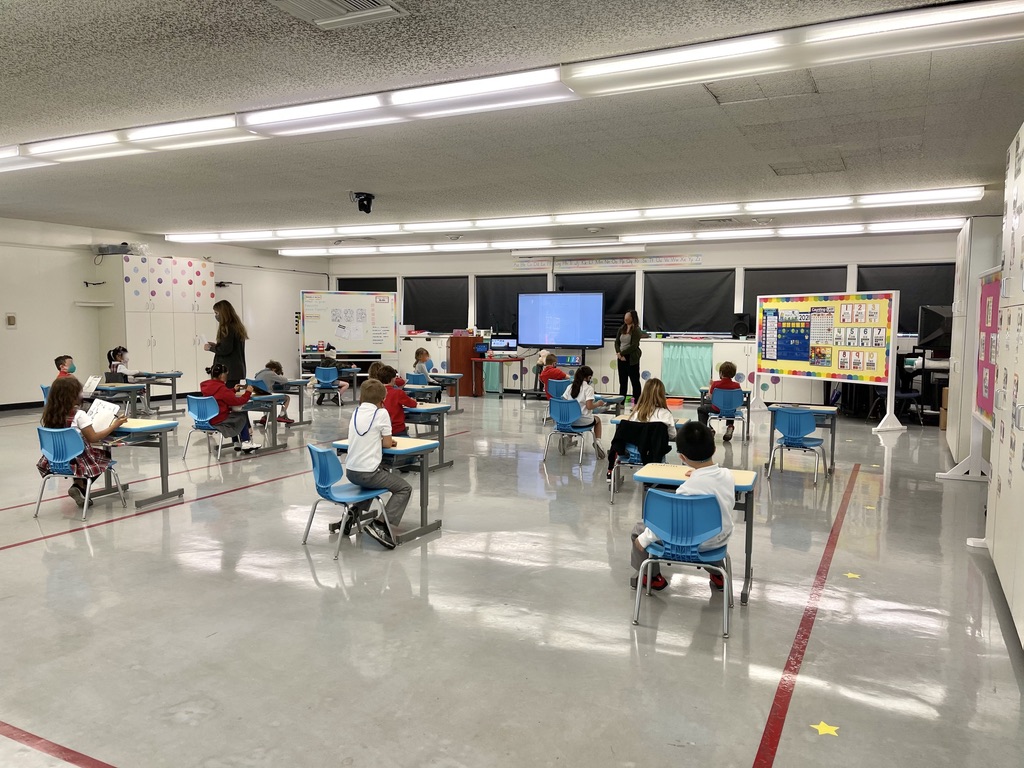
Classroom setups vary widely. They can run in rooms outfitted with video conferencing installations and in areas of the school we call hubs, where students are allowed to use headsets to connect with onsite or offsite teachers. The scenarios are many.
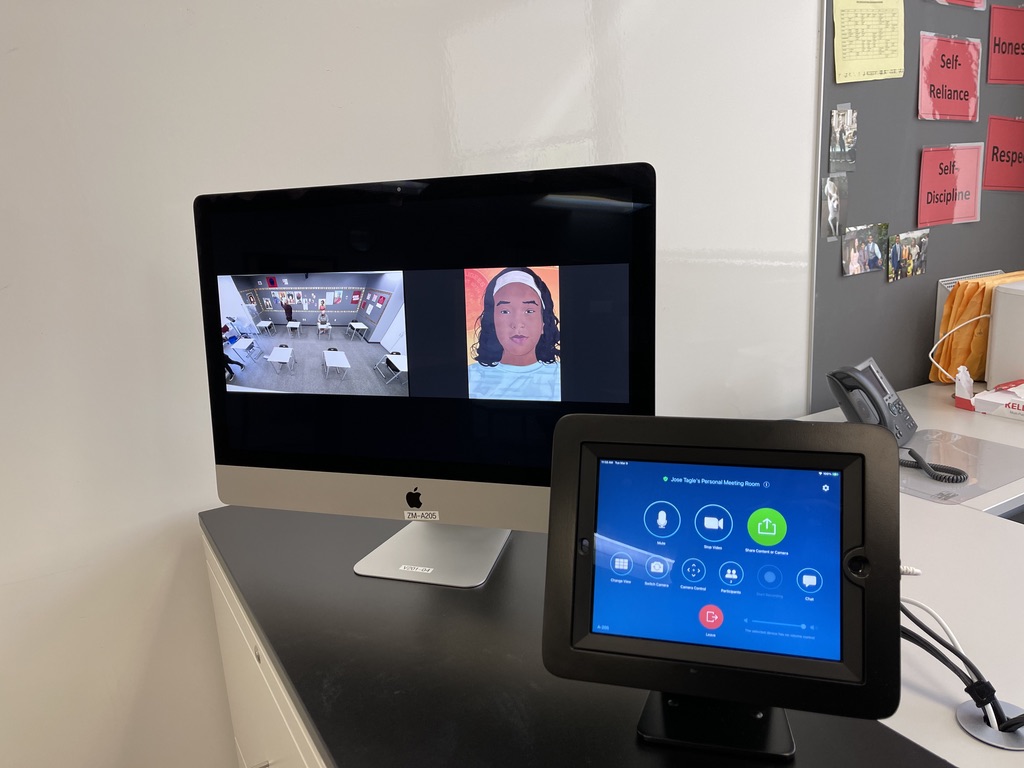
The Buckley School has equipped all teaching spaces with video cameras and microphones to create a hybrid learning environment. Video conferencing software (Zoom Rooms) connects in-person and remote students to the synchronous class. A typical classroom set-up entails three camera angles and ceiling-mounted Shure condenser microphones, as well as an iMac. One camera is a ceiling-mounted Aver 4K auto-tracking camera facing the front of the classroom, while the secondary camera is an ePTZ webcam installed at the top of the classroom display facing the student desks. The iMac not only runs the conferencing software, but also provides the third camera angle via its built-in camera. It also displays the remote students in a gallery view.
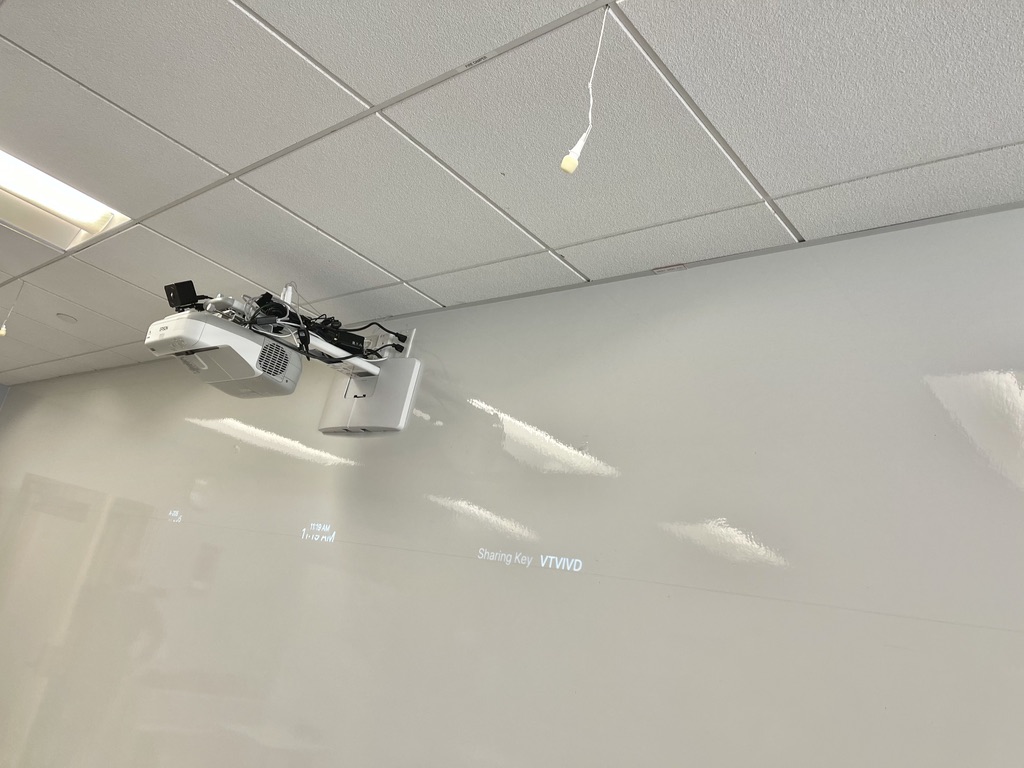
Technology deployments, no matter how great they are, are usually a burden for teachers who already have a full plate. Providing teachers every possible opportunity for training in both availability and approaches was the key to a successful implementation. Although teachers had access to user guides, cheat sheets, and videos via our technology portal, they were able to schedule an in-person one-on-one training Monday through Friday. Strict COVID protocols were followed during in-person training sessions which took an average of 20 minutes. Because Buckley adopted the use of Zoom conferencing software, the learning curve for Zoom Rooms was minimized. Teachers were able to familiarize themselves with the technology in their classroom ahead of time – displays, microphones, audio, camera adjustments, connecting their own devices, and their positioning in the space (e.g. will they need to stay close to the teacher station so remote students can hear them?).
The following are step-by-step instructions onsite and substitute teachers follow:
- Turn the display (projector or TV) on and adjust the volume
- Launch Zoom Room app on the classroom iPad, and join a Zoom Meeting
- Once the session has begun, manage the participants/students by letting them in, adjust any camera angles, and begin instruction
- At this point, remote students are displayed on the iMac screen in gallery view
- If needed, connect the laptop to the provided HDMI cable, and click the Screen Share button on the Zoom Rooms app. The shared content is displayed onto the classroom display and remote student’s laptop
- Once the session is done, end the meeting for all.
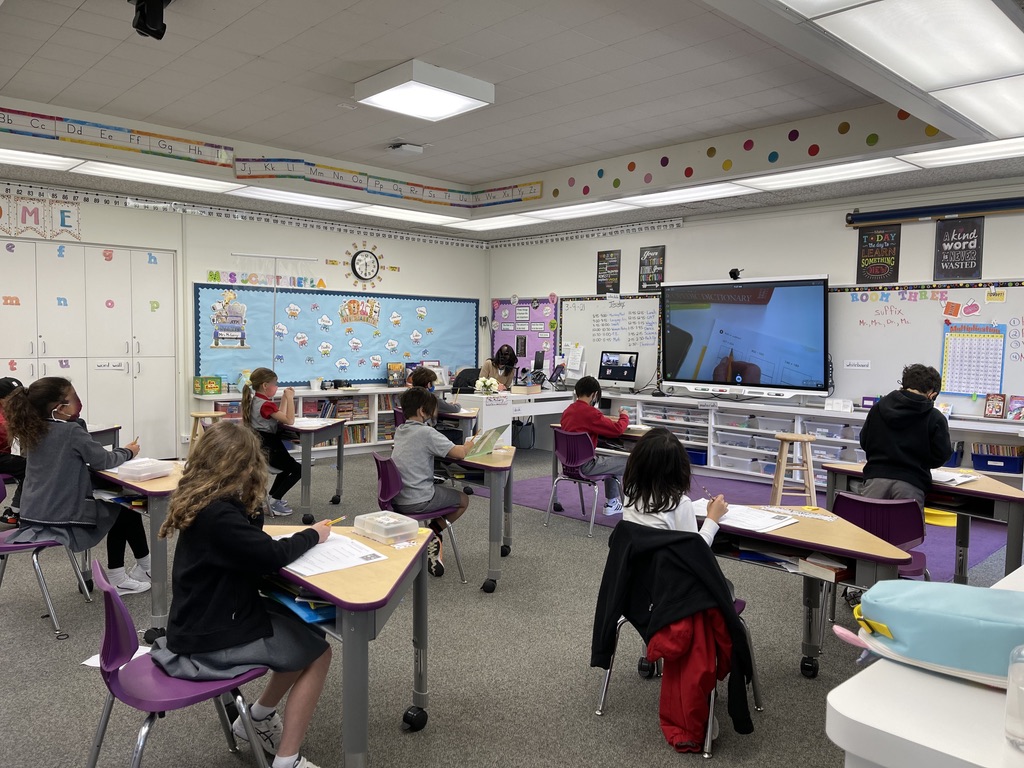
As mentioned earlier, there are multiple hybrid learning scenarios. What if you have onsite and remote students, and the teacher is also remote; teaching from home or from a different onsite location? What if a teacher is unable to be onsite with little notice given to the school? Are substitute teachers capable of launching a conferencing system? The Buckley School has dealt with all these scenarios. The technology department has been able to get substitute teachers ready in a moment’s notice; under 15 minutes at times. I should note that substitute teachers include learning specialists, hall monitors, athletic coaches and even staff members. Each conference-equipped classroom is self-contained. This means substitutes do not require an extra device (e.g. laptop) to connect remote students and teachers with onsite students–a resource saver! The classrooms have the capability to display the lead teacher or subject specialist (e.g. science, drama, music or dance teacher) on the classroom projector or TV display to minimize physical exposure between student and teacher. This was a county mandate. While these scenarios do not offer our students the same learning experience as face-to-face, it provides onsite students and teachers with a sense of togetherness.
Schools will need to make a decision as to whether a hybrid model will be adapted. If your school does opt to go hybrid, my hope is that my experience and the information provided will help guide your decision making.
LightWerks has a wide range of audio/visual solutions which include multiple monitors, projector and screen, web conferencing, total control systems and integrated audio & video.
Contact us at LightWerks today or fill in the form below for more information on what we can do for you or your organization!

